20 Sep How to Tie a Bow Tie with Confidence: Master the Art for a Flawless Finish
Bow ties are super cool accessories that can really make any outfit pop. Moreover, they have this timeless vibe that brings elegance and sophistication to your look. Additionally, knowing how to tie one yourself is a fun way to add a personal touch, whether you’re getting all dressed up for a fancy event or just wanting to spice up a casual outfit. In this guide, we’re going to show you how to tie a bow tie in a snap, complete with easy step-by-step instructions and styling tips. This will, in fact, help you to nail both the look and, furthermore, the technique.
What is a Bow Tie ?
First things first, before we dive into how to tie a bow tie , let’s quickly go over what a bow tie actually is. It’s basically a small ribbon-like accessory that wraps around the collar of your shirt. Moreover, bow ties have been all about elegance and sophistication for ages, so they totally stand out from regular neckties with their cool shape and style. Additionally, they have this unique vibe that can really make a strong fashion statement.
2 Types of Bow Ties
When you’re picking out a bow tie, you usually have two main choices: on the one hand, pre-tied bow ties; and on the other hand, self-tied bow ties
- Pre-Tied Bow Ties
First off, pre-tied bow ties are just what they sound like—they’re already tied up and good to go. Consequently, this makes them super handy for anyone who wants a simple and fast option. In fact, all you need to do is adjust the strap and clip it on around your neck.
- Self-Tie Bow Ties
On the other hand, self-tie bow ties are a little trickier. Just like it sounds, you have to tie these bad boys yourself. However, this gives you that old-school vibe and lets you show off your personal style.
Steps to Follow Before Tying a Bow Tie
Now, before you start tying a bow tie, getting ready beforehand can make it way easier and a lot more fun. Here’s what you should do first:
- Firstly, Gather Your Stuff: You’ll need a self-tie bow tie and, in addition, a mirror to help you practice.
- Secondly, Know the Occasion: Additionally, figure out when and where you’ll be wearing your bow tie. Whether it’s for a fancy event, a chill get-together, or a themed party, overall picking the right bow tie will keep you looking sharp and stylish.
8 Steps To Master How To Tie A Bow Tie
Getting the hang of tying a bow tie the classic way can seriously amp up your style and give you a sharp, neat look. So, check out these easy steps to tie a bow tie like a pro.
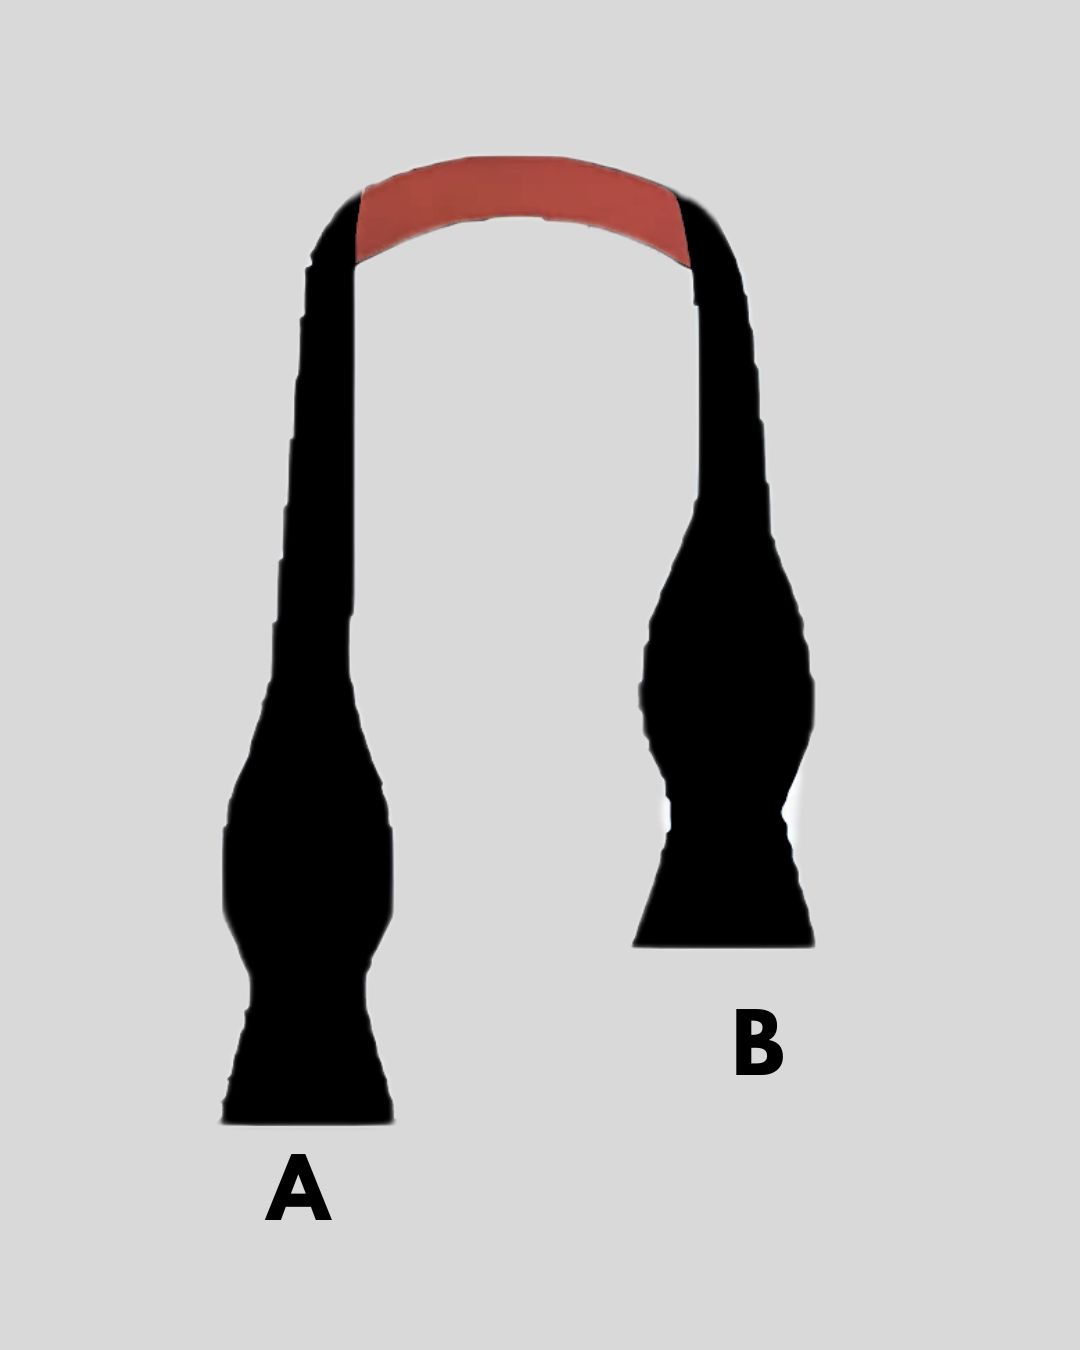
Step 1: Position the Bow Tie
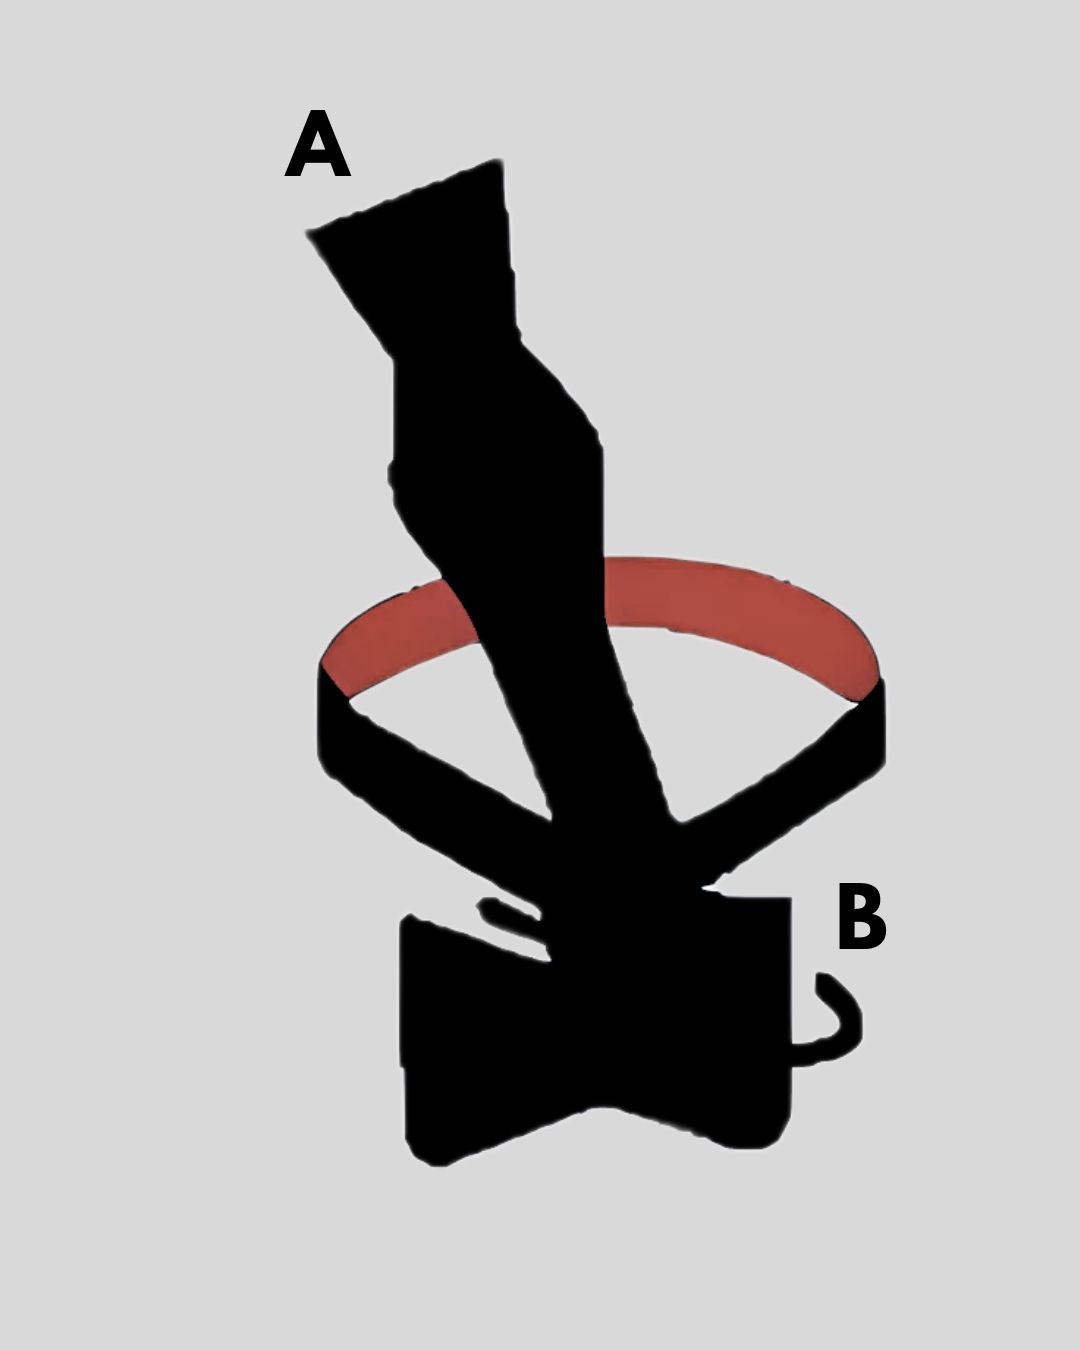
First things first, drape the bow tie around your neck. Specifically, make sure one end, which we’ll call A, is a good bit longer than the other end, B—like, a few inches longer. Furthermore, you want the longer end A to chill on your right side while the shorter end B hangs out on your left. Consequently, getting this set up right is super important for a nice, balanced bow tie.
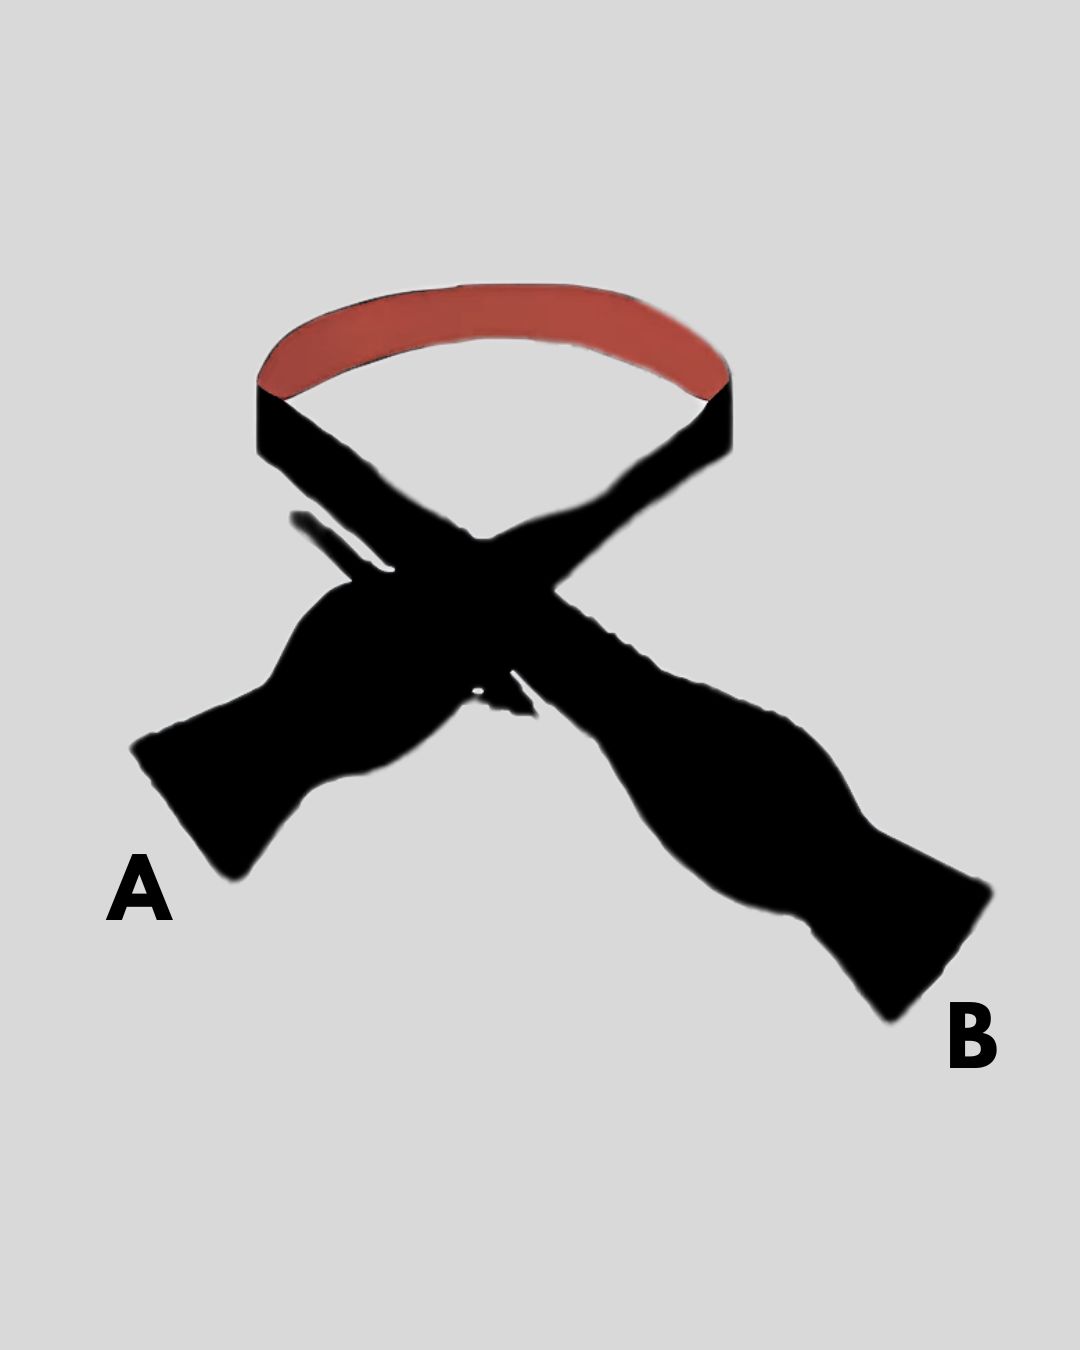
Step 2: Cross the Ends:
Now, take the longer end A and cross it over the shorter end B. At this point, this is where the knot starts to form. Then, carefully slide end A underneath end B and pull it through the middle. Finally, just keep a gentle grip so the fabric doesn’t slip around.”
Step 3: Fold End B.
Fold End B horizontally. In addition, this fold is key because it’ll create the front part of the bow. Therefore, make sure the fold is tidy and that the fabric lies flat—ultimately, this sets you up for a really nice bow.”
Step 4: Layer End A
With end B all folded up, place the longer end A over that fold. Therefore, line it up carefully so it sits evenly on top of end B. In fact, this part is important for nailing that classic bow shape since it’ll define the front of the bow tie.
Step 5: Fold End A.
Next, fold end A horizontally, just like you did with end B. Consequently, this fold shapes the second half of the bow and should match the first fold. Moreover, make sure the fabric is nice and smooth with the edges aligned to keep things looking sharp.
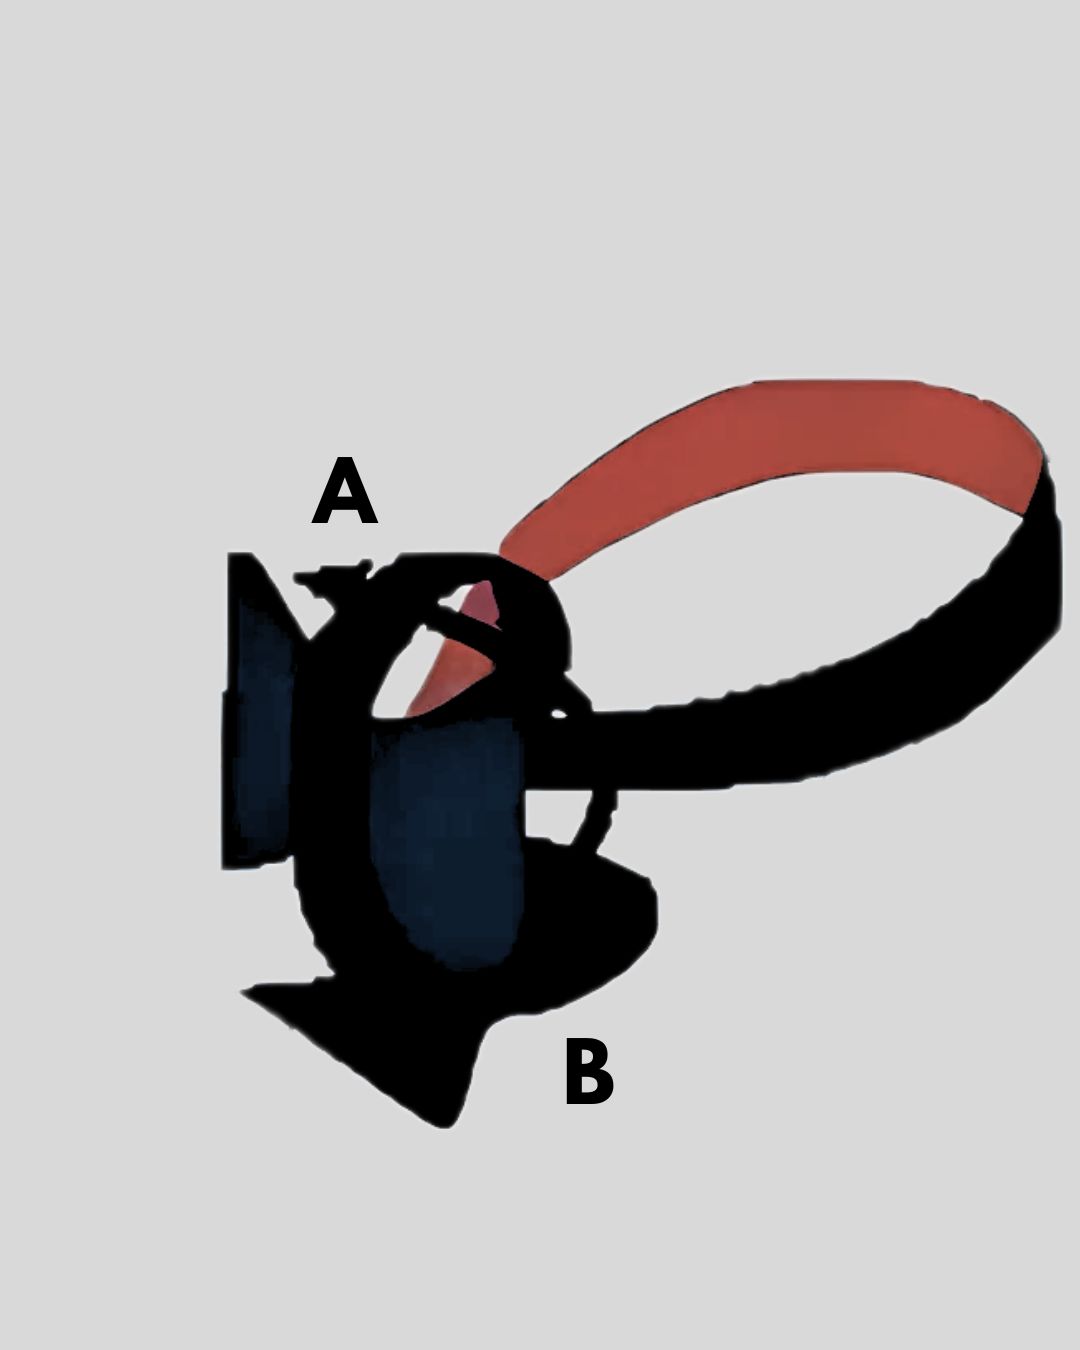
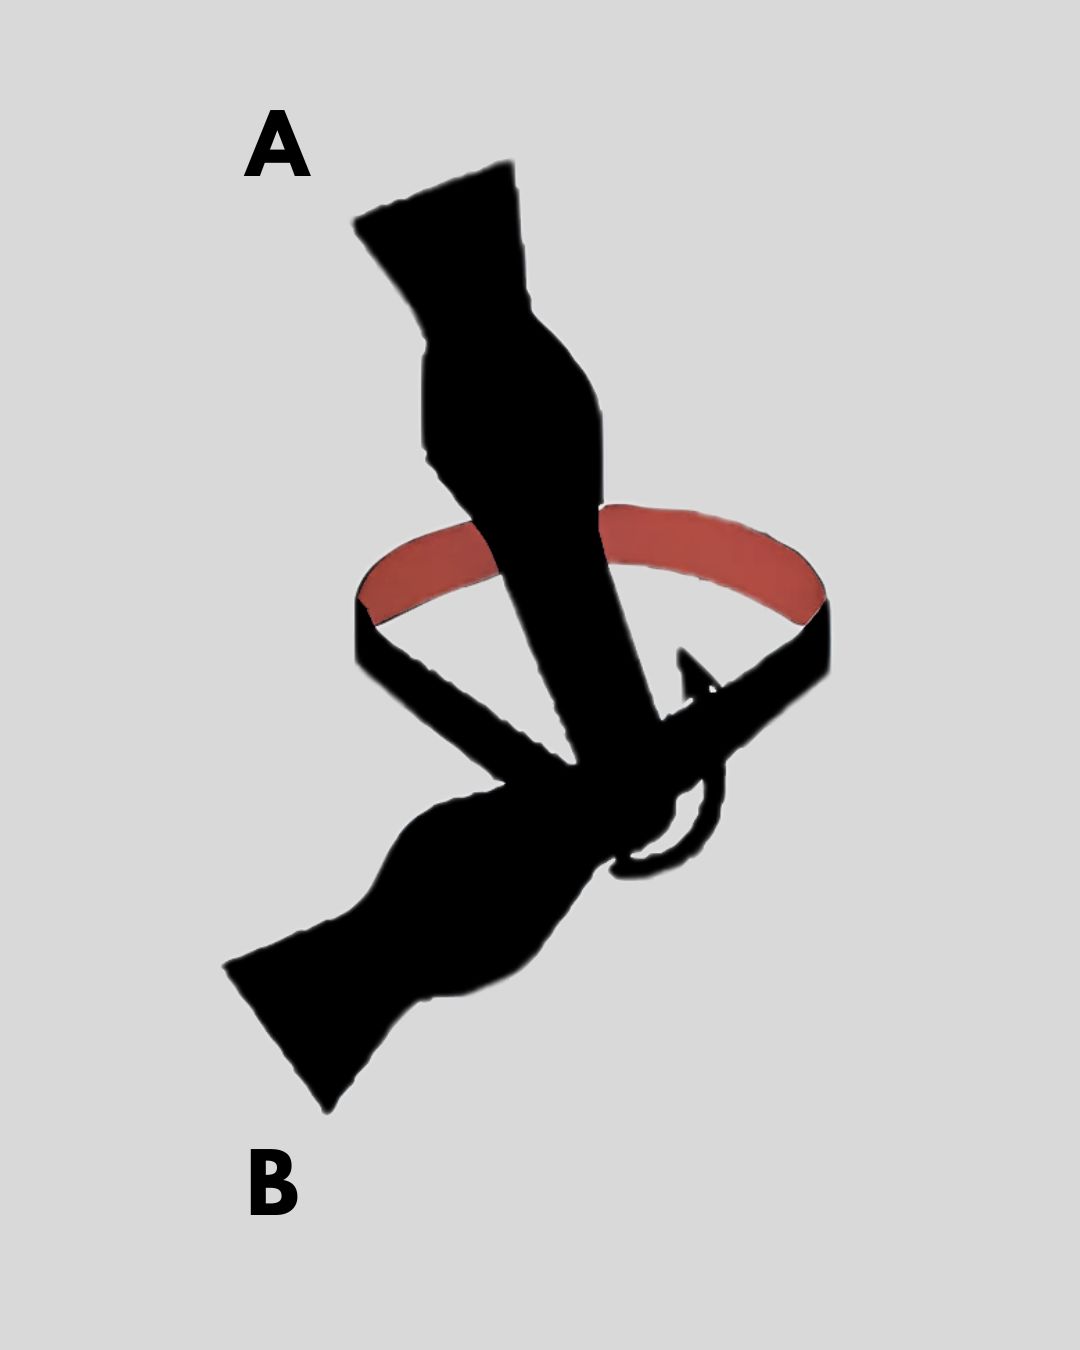
Step 6: Create the Loop.
At this point, slide end A through the loop that’s formed at the back of end B. Notably, this loop is super important for keeping the bow tie secure, so guide the fabric through carefully without twisting or crumpling it.
Step 7: Tighten the Knot.
Once end A is through the loop, gently pull on both ends A and B to tighten the knot. Furthermore, adjust how tight it is to what feels right for you—too tight might hurt, and too loose could look messy. Ultimately, the goal is to hit that sweet spot where it feels secure but comfy.”
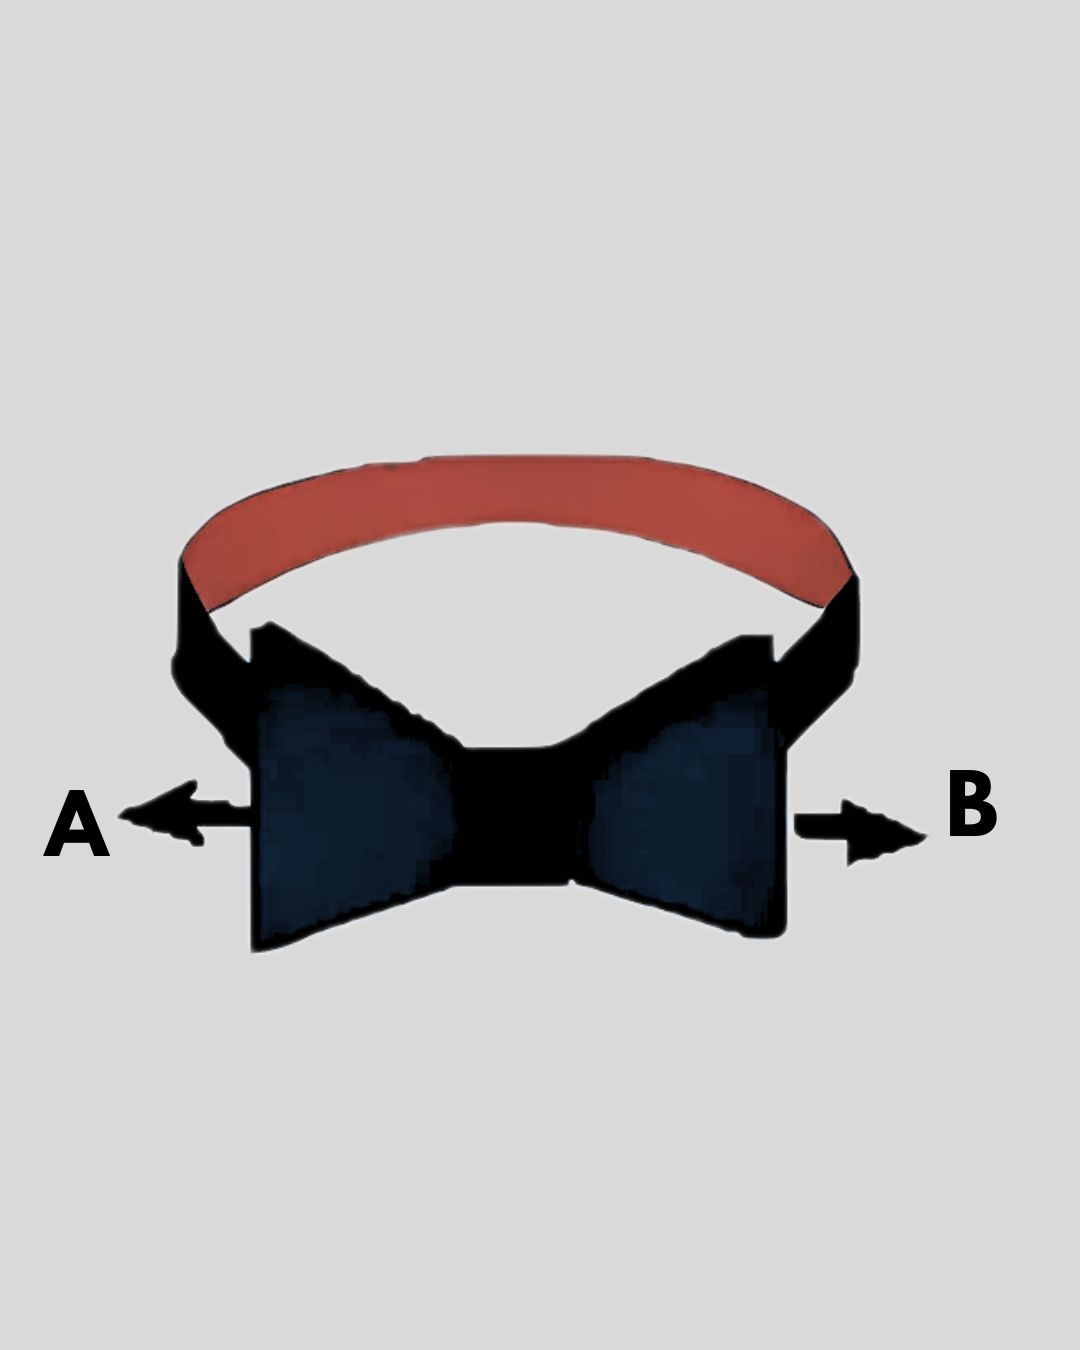
Step 8: Make Final Adjustments
Finally, take a sec to adjust the bow tie if you need to. Check that both ends A and B are even and that the bow is sitting nicely in the middle. Don’t stress if there are a few little imperfections; they can actually add character and make your look unique. With a bit of practice, you’ll find the perfect vibe for your style!Now you’re all set to rock that bow tie with confidence!
Unique Bow Tie Tying Methods Beyond the Classic Look
Along with knowing how to tie a bow tie, you must be aware that besides the classical knot, you can tie your bow ties in many other different ways. Moreover, each offers a unique look for different occasions. Consequently, knowing them can help you find the perfect bow tie for any event. Furthermore, the following table provides a clear comparison of the different types of bow ties, their shapes, and suitable occasions for each style.
| Bow Tie Type | Shape | Occasions |
| Diamond Point | Ends in a sharp diamond shape. | Ideal for formal wear; adds a unique touch. |
| Butterfly | Wider, rounded loops. | Versatile for formal and semi-formal events. |
| Batwing | Narrow, straight ends. | Suited for less formal events; modern look. |
| Double | Two layers of bows. | Perfect for standout occasions; adds extra flair. |
| Slim | Thinner than traditional bow ties. | Works well for casual or semi-formal settings. |
| Big Butterfly | Larger, exaggerated loops. | Ideal for making a strong fashion statement. |
| Clip-On | Clips onto the collar. | Easy to wear; practical for no-fuss situations. |
Common Mistakes While Tying A Bow Tie and How to Avoid Them
When tying a bow tie, certain mistakes can definitely affect the final look. Therefore, by being mindful of these common issues and how to fix them, you can achieve a perfect bow tie every time.
- Over-tightening the Bow Tie: Firstly, ensure that you avoid making the bow tie too tight. In other words, it should be snug but comfortable. Consequently, over-tightening can cause discomfort and make the bow tie look awkward.
- Uneven Loops: Secondly, check for symmetry to ensure both sides of the bow are even. Additionally, uneven loops can make the bow tie look unbalanced.
- Not Practicing Enough: Lastly, practice tying your bow tie before the big day. This will not only help you feel more confident but also ensure a flawless look. Ultimately, regular practice makes the process easier and helps perfect your technique.
Styling Tips for Every Occasion, Season, and Look
If you are bored of getting dressed the same way or, on contrary. if you are confused, then we have styling tips for you. In fact, here’s a complete list of styling tips for your bow tie, keeping in mind every occasion and season. Certainly, these will prove to be very helpful in learning how to tie a perfect bow on a dress.
| Occasion | Style | Description |
| Formal Events | Classic Black Tie | Black silk bow tie with a tuxedo and white dress shirt. |
| White Tie | White bow tie with a tailcoat and wing-collar shirt. | |
| Semi-Formal Events | Dinner Parties | Dark-colored bow tie (navy or burgundy) with a dark suit and light shirt. |
| Cocktail Parties | Bow tie with patterns; pair with blazer and dress pants. | |
| Casual Settings | Smart Casual | Cotton or linen bow tie in bright colors with a button-down shirt and chinos/jeans. |
| Daytime Events | Pastel bow tie with light shirt and khakis. | |
| Creative Styles | Mix and Match | Combine patterns and textures, like plaid with stripes. |
| Layering | Add a vest or cardigan for a layered look. | |
| Seasonal Styles | ||
| Winter | Velvet or wool bow ties | Velvet or wool bow ties in deep colors like emerald or maroon. |
| Summer | Lineen Bow ties | Lightweight fabrics like linen in bright colors. |
| Accessorizing | ||
| Formal Events | Pocket Squares | Match your bow tie with a complementary pocket square. |
| Suspenders | Pair with suspenders for a vintage-inspired look. | |
| Cufflinks | Add matching cufflinks for elegance. | |
| Customization | ||
| Personal Touch | Custom Bow Ties | Custom-made bow ties for unique style or matching outfits. |
| Vintage Bow Ties | Find unique, one-of-a-kind bow ties in vintage shops. | |
To Sum UP
Bow ties are not just for special occasions; in fact, they’re versatile and stylish accessories that can elevate any outfit. Moreover, with a little practice and creativity, you can master how to tie a bow tie and enjoy the charm it brings. Hopefully, this how to tie a bow tie easy guide will help you prevent mistakes. Therefore, keep practicing, and have fun with your bow tie!
FAQ
1. How do I choose the right bow tie for a formal event?
For formal events, you should opt for classic styles like a black silk bow tie for black-tie or, alternatively, a white bow tie for white-tie occasions.
2. Can I wear a bow tie to a casual event?
Yes, for casual events, you can choose a cotton or linen bow tie in a fun pattern or bright color to match a relaxed outfit.
3. What’s the best way to practice tying a bow tie?
To practice tying a bow tie effectively, use a mirror to observe yourself tying a self-tie bow tie. This, in turn, helps you see and adjust the bow tie as you learn the technique.”
No Comments